Preparing your bike for an overnight ride.
So you are ready! Well, at least you have decided to take an overnight bicycle ride. But shoot! How do you gear up your bike for the ride? Should I wear a backpack, use bike panniers or throw my gear in a basket/crate? Here are a few tips on how to prepare your two-wheeler for an overnighter.
Carrying Gear On Your Bike
Like the title says carrying gear on your bike, not your back. Wearing a back pack or messenger bag while riding is great for short trips that are under 2 hours but when it comes to all day riding/long distance the back pack will start to wear you down. It will put unnecessary strain on your shoulders and make for a really sweaty back. I've seen people do it, heck we even tried it. Our message is this: do yourself and your body a favor and put the gear on the bike and really up' the enjoyment of your riding experience.
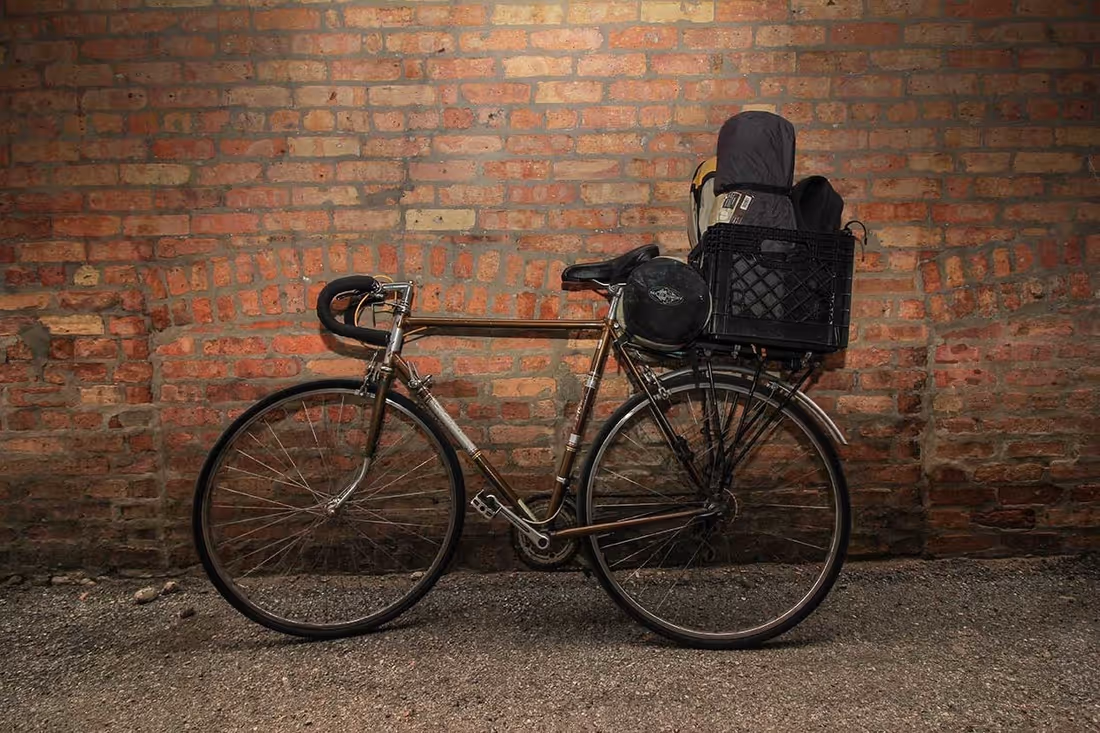
The Budget Route: Crate/Basket
You can get your gear off your back for under $20. How? A bike rack, milk crate, some zip ties or hose clamps and a small tarp or waterproof bag. The crate/basket is an ideal bicycle camping setup for the weekend ride. With all major camping gear fitting securely in tow you still have room for a pack, storing all necessary small supplies fitting neatly into your hiking backpack. When ready you can "grab and go" on a walk to the beach, the trail, or walk around for the day comfortably with a well design hiking/backpack.
Pros
- Inexpensive or free!
- Easy access
- Quick transition from biking to hiking
- Holds your backpack
Cons
- Not stylish? (it has it's own style, it works! )
- High center of gravity
- Less overall cargo space (it's only a weekend)
How to set it up
- First, head to your local bike shop and buy a bike back rack for $10-$50. Avoid the racks that only attach to the seat post. You want one that has arms that come down and attach to the bike near the back wheel hub as well as the frame near the seat post.
- Second, walk over to your local grocery story to ask for a milk crate from behind the store.
- Third, go to the hardware store and buy 4-6 heavy duty zip ties or small hose clamps .
Fourth, assemble. Get the rack on your bike and the crate on the rack using the zip ties or hose clamps (at least one in each corner). Place the crate as far back on the rack as it can go as well as centered to the right and left. - Fifth, load up your gear. Ideally, get the sleeping bag into the bottom of the crate, and a light back pack with personal items on top of the sleeping bag for easy access. Then, fit the tent and/or sleeping pad between the seat post and crate. Bungeeing a sleeping pad to the top of the crate works as well, as long as you still have access to the items you will need during the ride.
- Finally, bring a small tarp or waterproof bag that fits on and/or around the items in the crate in case you get some rain.
Now, pat yourself on the back! You are ready for an overnighter!
The Slightly More Expensive Route: Bike Panniers
Pros
- Waterproof
- Low center of gravity
- More cargo room
- Can detach easily
Cons
- Expensive
- They are not hiking backpacks
- Rack & pannier must be compatible
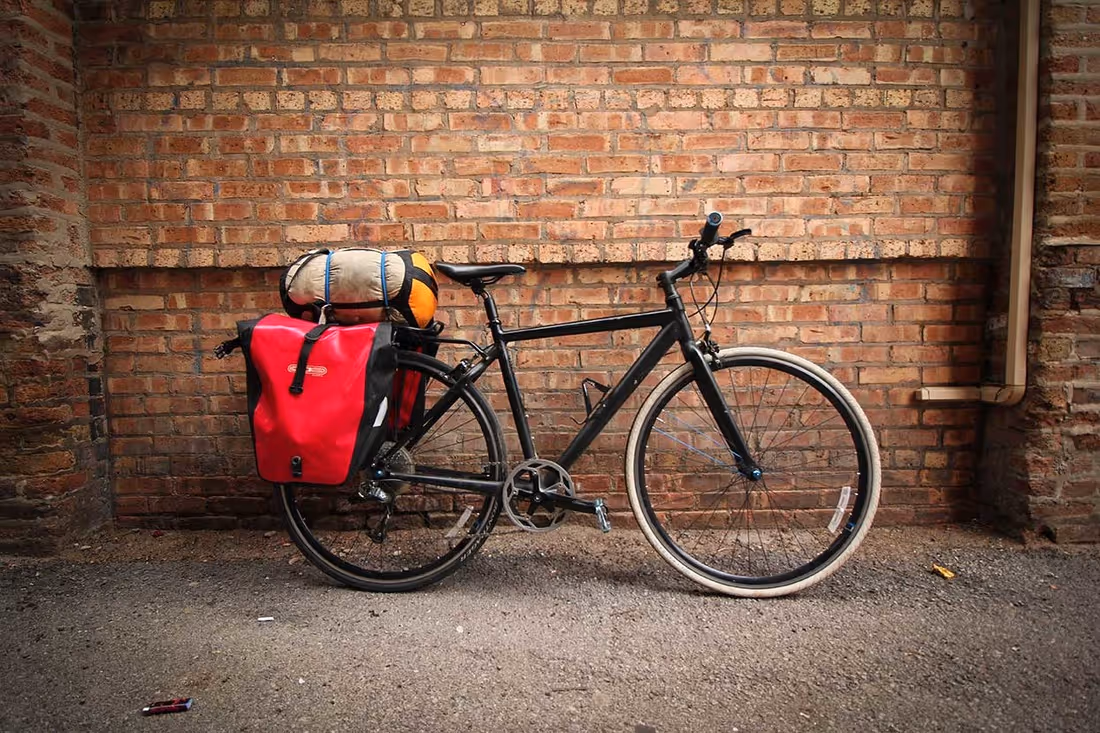
Now, for those of you that have about $150 to drop on some nice panniers.
How to set it up
- The first step is the same as above, get a bike back rack.
- Second, go to your local bike shop or amazon and get some panniers. Ortlieb waterproof panniers are excellent, waterproof, built to last and proven by many long distance riders. They cost around $150 for a set of two.
- Third, snap those panniers onto your bike rack.
- Last of all, put your gear into the panniers, strap your tent, sleeping bag, sleeping pad onto the top of your back rack with a bungee and you are ready to roll. See if you can’t get your sleeping bag into one of the panniers if there is room. Keep in mind what items you will need along the ride and keep them packed on top for easy access.
Yes! You are geared up and ready to roll!
The Bike Trailer – The complete deluxe camping ride edition
Typically trailers are used on long week/month bike tours or are used to move large cargo around town, but how can you incorporate a bike trailer for a weekend ride? Well for starters you can tug a whole barbecue grill, or even bring a beach umbrella. Heck, you can even bring a full on ice cooler stacked with snacks and supplies. With these added loads comes the responsibility of handling the bike down and up hill as well as prolonged stopping power. It is rare to find the need to specifically have one just for a weekend ride, unless your really do want to bring that beach chair, but bicyclists typically use panniers or a crate for their weekend overnight trips. If you are planning a multi-week tour, a bike overnight is a great place to start and test your trailer equipment for any future long distance touring.
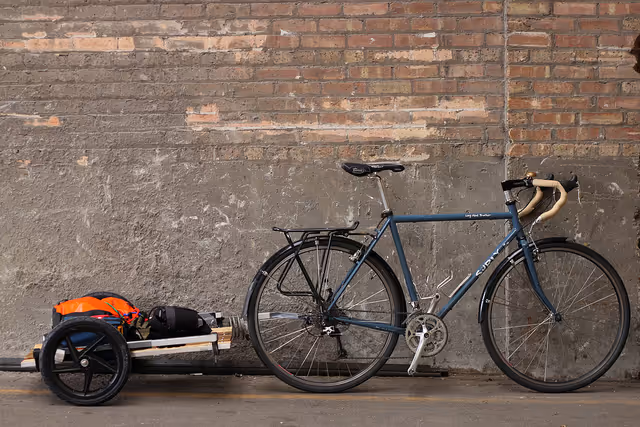
Pros
- Keeps the weight off the bike]
- More cargo space & holds more weight
- Less head wind drag
Cons
- Adds rolling resistince
- Expensive
- Hard to find parking/storage
- Holds more weight
Handle Bar bag – Quick where's my camera
Pros
- Bonus points for convenience
- Holds cue sheet/directions
- Holds Camera for quick pictures
- Important items/snacks are in front of you
Cons
- Can effect steering
- Some models are cheap and will snap off but great models are available.
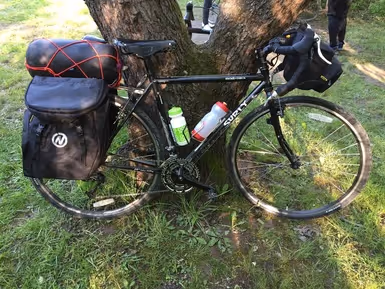
The Handle Bar bag is a great addition to a weekend bike adventure. It holds frequent items right in front of you that need to be accessed multiple times through out the day. There is no need to get off your bike or turn around when you want to grab a snack or take a quick picture. Even better yet there are some handle bar bags that have a clear front pocket top, where you can store your directional turn by turn cue sheet. That feature alone saves time and all you need to do is take a quick glance down to know where your next turn will be. Make sure when shopping around for a handle bag that it does not interfere with your braking system, buy one that is the appropriate width so it fits between your brake handles. Also make sure the harness system is one of durable construction. Over time and many bumps later, some poorly constructed handle bag connection points tend to snap or the Velcro straps become loose. To prevent this you can install a front rack to support your handle bar bag from all the little bumps you may encounter.